
The Arabic alphabet consists of 28 letters, each with unique shapes and sounds, essential for reading, writing, and speaking Arabic. PDF resources provide comprehensive guides, practice sheets, and interactive exercises to master these letters, making learning accessible and effective for beginners and advanced learners alike.
1.1. Overview of the Arabic Alphabet
The Arabic alphabet comprises 28 distinct letters, each varying in shape depending on its position within a word. These letters are written from right to left and are cursive by nature. PDF resources offer detailed charts, practice sheets, and guides to help learners master the alphabet. They often include transliterations, pronunciations, and visual demonstrations of letterforms. Such resources are invaluable for beginners, providing a structured approach to understanding the foundational elements of the Arabic script. The availability of PDF workbooks and interactive exercises simplifies the learning process, making it accessible for individuals to study at their own pace and improve proficiency effectively.
1.2. Importance of Learning Arabic Letters
Mastery of Arabic letters is crucial for understanding the Quran, classical Islamic texts, and Arabic literature. Learning these letters opens doors to rich cultural and linguistic heritage, enabling effective communication in Arabic-speaking communities. PDF resources provide structured lessons, making it easier to grasp the fundamentals. They often include practice sheets, transliterations, and pronunciation guides, which are essential for beginners. Acquiring this skill enhances cognitive abilities and appreciation for the language’s beauty. The availability of PDF materials ensures that learners can access comprehensive tools anytime, facilitating a deeper connection to the language and its cultural significance.
1.3. Benefits of Using PDF Resources for Learning
PDF resources for Arabic letters offer numerous benefits, including comprehensive guides, practice sheets, and interactive exercises. They provide clear visuals and consistent formatting, making learning easier. PDFs are portable, accessible on various devices, and often include transliterations and pronunciation guides. Many resources feature quizzes and worksheets to reinforce learning. They cater to different skill levels, ensuring a gradual progression. Additionally, PDFs allow learners to practice writing and pronunciation at their own pace, making them ideal for self-study. Their availability online ensures widespread accessibility, making Arabic letter learning more convenient than ever. This format supports effective and enjoyable language acquisition.
History and Evolution of Arabic Letters
The Arabic script traces its origins to ancient Semitic writings, evolving over centuries. Its development is linked to early Islamic civilizations, where it became a tool for preserving knowledge and culture.
2.1. Origins of the Arabic Script
The Arabic script originated from the Aramaic script, evolving through the Nabataean and Syriac alphabets. It emerged in the 5th century CE in the Arabian Peninsula, gaining prominence with Islam. Early inscriptions, like the Namara Stone (328 CE), show pre-Islamic influences. The script was refined post-Islam, with diacritics added for clarity. Its development is closely tied to the spread of Arabic as a liturgical and literary language, becoming a cornerstone of Islamic culture and scholarship.
2.2. Development of Arabic Calligraphy
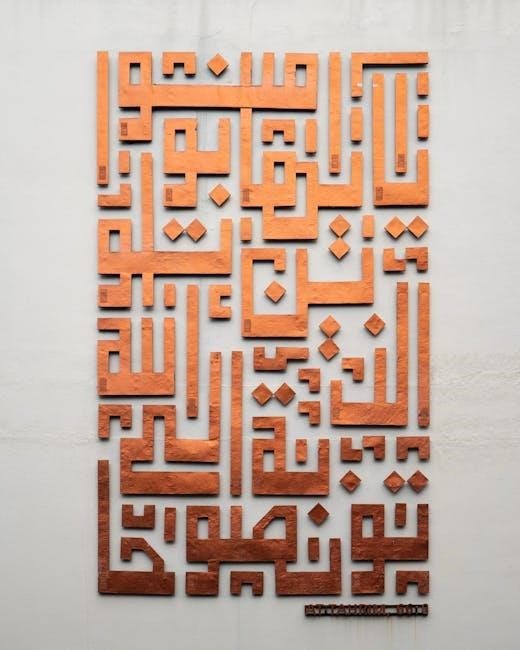
Arabic calligraphy evolved as a revered art form, deeply intertwined with Islamic culture and spirituality. Originating in the early Islamic period, it flourished under the Abbasid Caliphate, with scripts like Kufic and Naskh becoming prominent. Calligraphy was not only a means of beautifying texts but also a way to honor the divine. Over centuries, it developed into intricate geometric and cursive styles, symbolizing the richness of Arabic literature and art. Today, PDF resources offer detailed insights and examples of these scripts, preserving their historical significance and making them accessible for modern learners and enthusiasts of Arabic calligraphy.
2.3. Historical Significance of Arabic Letters in Literature
Arabic letters have played a central role in preserving and spreading literary works across the Islamic world. The script was instrumental in recording the Quran, Hadiths, and classical Arabic poetry, becoming a cornerstone of Islamic scholarship. Historical texts, such as “Adab-e khatt,” detail the rules of writing Arabic letters, showcasing their artistic and intellectual value. PDF resources now provide access to these historical documents, enabling modern learners to explore the literary heritage embedded in Arabic letters. Their enduring importance is evident in their continued use in religious, academic, and cultural contexts, bridging the past with the present.
Structure of the Arabic Alphabet
The Arabic alphabet contains 28 letters, classified into vowels and consonants, each with distinct shapes and sounds. PDF guides detail their forms, pronunciation, and unique script features.
3.1. Total Number of Letters and Their Classification
The Arabic alphabet consists of 28 letters, categorized into vowels and consonants. Vowels include حروف العلة (short vowels) and حروف المد (long vowels), while consonants are further divided based on their pronunciation and articulation. PDF resources often include charts that list each letter, their shapes, transliterations, and sounds, aiding learners in understanding and memorization. These classifications help in mastering the script, as each letter has distinct forms when standalone or connected in words. The structured organization of letters in PDF guides makes learning accessible and systematic, ensuring a clear progression from basic recognition to advanced reading and writing skills.

3.2. Vowels and Consonants in Arabic
Arabic script distinguishes between vowels and consonants, with 3 short vowels (حروف العلة) and 3 long vowels (حروف المد). Short vowels are َ، ِ، ُ, while long vowels are آ، إ، أ. Consonants total 25, each with unique pronunciation. PDF resources provide clear charts, demonstrating vowels’ placement above or below consonants, aiding in pronunciation accuracy. These materials often include exercises for practicing vowel-consonant combinations, enhancing reading fluency. Understanding vowels and consonants is crucial for accurate pronunciation and comprehension, making them a foundational focus in Arabic learning resources.
3.3. Unique Features of Arabic Script
Arabic script is written from right to left, with most letters connecting to each other in a flowing manner. Many letters change shape depending on their position in a word—initial, medial, or final. Diacritics, such as ضمة and كسرة, indicate vowel sounds and are essential for accurate pronunciation. PDF guides often highlight these features, offering detailed visuals and practice exercises. Additionally, Arabic script includes specific ligatures and unique letterforms, making it aesthetically distinct. These characteristics are vital for correct writing and reading, emphasizing the importance of dedicated study materials like PDF workbooks for mastering the script effectively.
Pronunciation and Transliteration
Arabic letters have distinct pronunciations, often differing from English. PDF resources provide transliteration guides, helping learners match Arabic sounds with familiar Roman characters, aiding accurate pronunciation and reading skills.
4.1. How to Pronounce Arabic Letters Correctly
Pronouncing Arabic letters accurately requires understanding their unique sounds and articulations. Many Arabic letters have no direct English equivalents, making proper technique essential. PDF resources often include audio aids and detailed descriptions to help learners master pronunciation. Practice begins with understanding the position of the tongue, lips, and vocal cords for each letter. For example, letters like ض (dhal) and ظ (zha) are pronounced with a voiced dental fricative, unlike any English sound. Regular practice with PDF guides, which often include pronunciation keys and exercises, helps learners refine their skills and achieve accurate intonation and articulation in Arabic.
4.2. Transliteration Systems for Arabic Letters
Transliteration systems convert Arabic letters into Latin script, aiding pronunciation for non-native speakers. PDF guides often include standardized systems like the ISO 233 norm or the DIN 31635 standard, ensuring consistency. These systems represent Arabic sounds with English letters, such as ‘خ’ as ‘kh’ and ‘ض’ as ‘d’. Simplified systems may omit diacritics for ease of use. PDF resources provide charts and exercises to connect Arabic script with familiar English sounds, enhancing learning by offering clear and consistent representations. This consistency is crucial for avoiding confusion, especially with unique Arabic sounds lacking direct English equivalents. Such systems are invaluable in educational materials, promoting effective learning of Arabic letters through integrated practice tools.
4.3. Common Challenges in Pronunciation
Mastering the pronunciation of Arabic letters can be challenging due to unique sounds not found in English, such as the guttural sounds of ‘خ’ (kh) and ‘ض’ (dhal). Emphatic consonants like ‘ط’ (ta) and ‘ض’ (dhal) require precise tongue placement, often difficult for learners. Vowels also pose challenges, as their pronunciation varies based on word position and surrounding letters. PDF resources often include pronunciation guides and practice exercises to help learners overcome these hurdles. Regular practice with audio aids and interactive tools in PDFs can significantly improve accuracy. Consistency is key to mastering these distinct sounds and achieving fluency in Arabic pronunciation.

Writing Arabic Letters
Writing Arabic letters requires understanding their shapes, connections, and proper stroke orders. PDF guides provide practice sheets and detailed instructions to help learners master Arabic handwriting effectively.
5.1. Step-by-Step Guide to Writing Arabic Letters
A step-by-step guide to writing Arabic letters involves understanding each letter’s shape, starting points, and connecting lines. Begin with the baseline, add the main strokes, then the dots and diacritics. Practice each letter separately before combining them. PDF resources offer visual aids, making it easier to follow along. Start with simple letters like ا (alif) and ب (bā’), then progress to more complex ones. Pay attention to the direction of writing, as Arabic is written from right to left. Regular practice with PDF worksheets ensures mastery of letterforms and correct placement of diacritical marks.
5.2. Correct Postures and Techniques for Writing
Proper posture and techniques are crucial for writing Arabic letters effectively. Sit comfortably with the paper placed slightly angled to the right. Hold the pen with a firm yet gentle grip, allowing precise strokes. Keep wrists straight to maintain control over letterforms. PDF guides often include diagrams to illustrate optimal hand positioning and pen angles. Practice writing with the paper aligned to the right, as Arabic script flows from right to left. Use smooth, deliberate movements to ensure clear and legible letters. Regular practice with these techniques will enhance handwriting and make learning Arabic letters more efficient and enjoyable.
5;3. Practice Exercises for Improving Handwriting
Consistent practice is key to refining Arabic handwriting. Begin with tracing exercises, focusing on letterforms and connections. Write each letter multiple times to master shapes and strokes. Use PDF worksheets that provide guided sheets for practice. Pay attention to letter spacing and alignment, as Arabic script flows right to left. Regular drills improve muscle memory and accuracy. Gradually transition from tracing to independent writing to build confidence. Incorporate word exercises to apply letter knowledge in context. Regular review and practice ensure steady progress in mastering Arabic handwriting, making learning both effective and enjoyable with structured PDF resources.

Arabic Letters in PDF Format
PDF resources offer comprehensive guides, practice sheets, and interactive exercises for mastering Arabic letters. They provide clear visuals, step-by-step instructions, and printable materials, making learning accessible and efficient for all learners.
6.1. Popular PDF Resources for Learning Arabic Letters
Popular PDF resources for learning Arabic letters include comprehensive guides, practice sheets, and interactive exercises. These resources often feature alphabet charts, transliteration aids, and step-by-step writing instructions. Many PDFs are designed for beginners, offering clear visuals and reproducible materials. Some notable resources include Arabic alphabet workbooks, which provide space for practicing letterforms, and PDFs focused on pronunciation and transliteration systems. Additionally, digital downloads and printable materials are widely available, catering to both children and adults. These resources are highly recommended for their structured approach and accessibility, making them ideal for self-study or classroom use. They are widely shared and used globally.
6.2. Features of a Good Arabic Letters PDF
A good Arabic letters PDF should include clear, high-quality visuals of each letter, providing both isolated and connected forms. It should offer transliteration guides, pronunciation tips, and step-by-step writing instructions. Interactive features, such as clickable letters for audio pronunciation, enhance learning. Well-organized layouts, with ample space for practice, are essential. Many PDFs also include cultural insights and historical context. Encryption and PDF/A standards ensure durability and professional quality. Look for resources that cater to different skill levels, offering exercises tailored to beginners and advanced learners. Adaptive learning tools and progress tracking can further enrich the educational experience. These features make a PDF both practical and engaging.
6.3. How to Create Your Own Arabic Letters PDF
To create your own Arabic letters PDF, start by selecting high-quality content, such as clear letter visuals, practice sheets, and transliteration guides. Use design tools like Canva or Adobe Illustrator to organize the layout. Include interactive features like clickable letters for pronunciation. Add encryption for security and ensure compatibility with PDF/A standards for long-term accessibility. Consider adding cultural insights and historical context to enrich the material. Save your design as a PDF and share it for educational purposes. This customizable approach allows you to tailor the content to specific learning needs, making it both practical and engaging for users.

Learning Resources and Tools
Utilize Arabic alphabet PDF workbooks, educational apps, and online courses featuring interactive exercises, pronunciation guides, and practice sheets to enhance your learning experience effectively and efficiently.
7.1. Recommended Arabic Alphabet PDF Workbooks
High-quality Arabic alphabet PDF workbooks offer structured learning with practice sheets, letter tracing, and pronunciation guides. Popular options include “Arabic Alphabet Worksheet Booklet” featuring 28 practice sheets, each focusing on individual letters and their forms. These workbooks often include transliteration, pronunciation tips, and exercises for mastering letter connections. They cater to both beginners and advanced learners, providing a comprehensive approach to understanding the Arabic script. Many workbooks are digital downloads, making them accessible and printable for consistent practice. Combining these with interactive apps or online courses enhances learning effectiveness, ensuring mastery of the Arabic alphabet in a systematic manner.
7.2. Apps and Digital Tools for Practicing Arabic Letters
Modern apps and digital tools offer interactive and engaging ways to practice Arabic letters. Many apps include features like letter tracing, pronunciation guides, and quizzes to test progress. Some popular options provide step-by-step lessons, while others focus on gamification to make learning fun. These tools often complement PDF resources by offering audio clips for correct pronunciation and exercises to practice writing. Apps like those mentioned earlier allow learners to track their progress and revisit challenging letters. Digital tools are especially useful for self-paced learning, making it easier to master the Arabic alphabet anytime and anywhere with a smartphone or tablet.
7.3. Online Courses Featuring Arabic Letters PDF Materials
Online courses are an excellent way to learn Arabic letters, often incorporating PDF materials for structured learning; These courses provide interactive lessons, audio clips, and downloadable PDF workbooks. Many courses include step-by-step guides, practice sheets, and quizzes to reinforce learning. Platforms like those mentioned earlier offer comprehensive programs tailored for beginners, with PDF resources that include letter charts, pronunciation guides, and writing exercises. These courses often allow learners to track their progress and revisit challenging lessons. By combining digital tools with PDF materials, online courses offer a flexible and effective way to master the Arabic alphabet from the comfort of your home.
Cultural and Linguistic Significance
Arabic letters are central to Islamic culture, influencing languages globally. Their unique script enriches linguistic diversity and preserves historical texts, contributing significantly to global linguistics.
8.1. Role of Arabic Letters in Islamic Culture
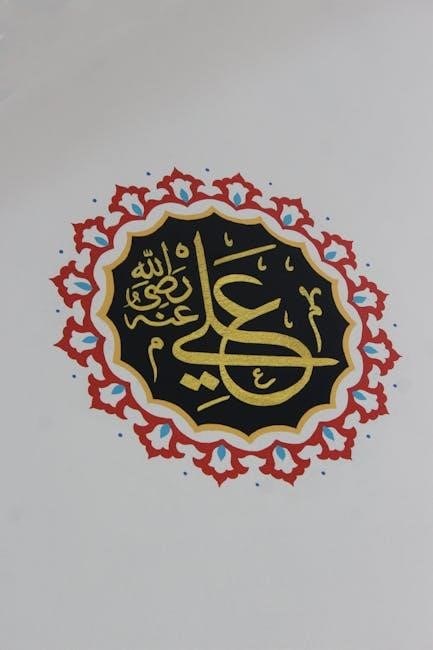
Arabic letters hold profound cultural and religious significance in Islamic traditions. They are the medium through which the Quran and Hadiths are preserved, making them sacred in Islamic heritage. The script’s beauty is revered, with Arabic calligraphy becoming a sacred art form. Islamic scholars have historically used Arabic letters to document religious texts, ensuring their integrity and accessibility. The script’s elegance and precision have also influenced Islamic architecture and art. PDF resources often highlight these cultural aspects, providing insights into the historical and spiritual importance of Arabic letters in Islamic identity and global linguistic heritage.
8.2. Use of Arabic Letters in Other Languages
Arabic letters are widely used in many languages beyond Arabic, such as Persian, Urdu, and Malay, due to historical and cultural ties. These languages adopted the Arabic script, often adding or modifying letters to suit their phonetic needs. For example, Urdu includes additional letters not found in Arabic to represent sounds specific to South Asian languages. Similarly, Malay used Arabic script before transitioning to Latin. PDF resources often include charts and practice sheets for these extended scripts, helping learners master the unique letterforms and diacritics. This highlights the adaptability and influence of Arabic letters in diverse linguistic traditions globally.
8.3. Contribution of Arabic Letters to Global Linguistics
Arabic letters have profoundly influenced global linguistics by spreading their script to diverse languages like Persian, Urdu, and Malay. Their adoption facilitated cultural exchange and preserved literary treasures. PDF resources detail how Arabic letters adapted to new phonetic needs, showcasing linguistic evolution. These scripts also aided in the transmission of knowledge during the Islamic Golden Age. Their impact is evident in the development of writing systems worldwide. PDF materials now enable learners to explore these contributions, highlighting Arabic letters’ enduring legacy in shaping global communication and language diversity.
Tips for Effective Learning
Use PDF guides for structured practice, focus on letter connections, and practice consistently. Flashcards and interactive exercises enhance retention and mastery of Arabic letters effectively.
9.1. Best Practices for Memorizing Arabic Letters
Start by using high-quality PDF guides that include clear visuals and transliterations. Focus on recognizing letters in isolation and in words. Practice writing letters daily to reinforce muscle memory. Use flashcards to test recall and pair letters with their sounds. Group similar letters for easier differentiation. Regularly review and repetition are key. Incorporate interactive exercises from PDF workbooks to engage visually and kinesthetically. Track progress to stay motivated and adjust your practice routine as needed. Consistency and patience are essential for mastering the Arabic alphabet effectively.
9.2. Using Flashcards and PDF Worksheets
Flashcards and PDF worksheets are invaluable tools for mastering Arabic letters. Flashcards help memorize letter shapes and sounds through repetitive practice. PDF worksheets provide structured exercises, such as tracing letters, matching games, and writing sentences. Many PDF resources include letters in isolation and connected forms, aiding in understanding cursive script. Worksheets often feature answers or guides, allowing self-correction. Interactive PDFs may include clickable flashcards or audio pronunciations. Regular use of these tools enhances retention and familiarity with the Arabic alphabet. They are especially useful for visual and kinesthetic learners, offering a hands-on approach to learning. Consistent practice with these tools accelerates progress significantly.

9.3. Importance of Regular Practice
Regular practice is essential for mastering Arabic letters, as it builds muscle memory and improves accuracy. PDF resources provide structured exercises, such as tracing letters, writing words, and recognizing shapes. Consistent practice helps learners connect letters in cursive script and understand their pronunciation. Daily review, even for a few minutes, reinforces retention. Over time, regular practice fosters confidence in reading and writing Arabic. It is crucial to dedicate time to practice, as the Arabic script is highly cursive and requires familiarity with letter connections and diacritics. Regular practice ensures steady progress and fluency in using Arabic letters effectively.

Advanced Topics in Arabic Letters
Advanced topics explore Arabic calligraphy, intricate diacritics, and regional letter variations. PDF resources offer detailed guides and examples for mastering these sophisticated aspects of Arabic script.
10.1. Arabic Calligraphy and Art
Arabic calligraphy is a revered art form, deeply rooted in Islamic culture. Its evolution during the Middle Ages, as noted by scholars like Beatrice Gruendlers, highlights its historical significance. PDF resources offer intricate examples of calligraphic styles, such as Kufic and Naskh, along with practice sheets. These materials showcase the artistic flow of Arabic letters, blending aesthetics with linguistic meaning. Historical manuscripts and contemporary designs are often included, providing learners with a visual understanding of how letters transform into art. The connection between letterforms and Islamic spirituality is also explored, making PDF guides invaluable for both artists and language enthusiasts seeking to appreciate Arabic calligraphy’s cultural depth.
10.2. Diacritics and Their Importance
Diacritics, such as fatha, kasra, and damma, are essential for accurate Arabic pronunciation and meaning. They indicate vowel sounds, which are vital for distinguishing word meanings. In PDF resources, diacritics are often highlighted to aid learners in mastering pronunciation. These marks are particularly important in religious texts like the Quran, where precise recitation is crucial. Practice sheets in PDF format frequently include diacritics to help learners recognize and reproduce sounds accurately. Their inclusion in learning materials ensures that learners grasp the linguistic nuances of Arabic, making them indispensable for both beginners and advanced students aiming to refine their language skills.
10.3. Regional Variations in Arabic Letters
Regional variations in Arabic letters reflect diverse cultural and linguistic influences across the Arab world. While the core alphabet remains consistent, certain letters may be written or pronounced differently in regions like the Maghreb, Gulf, or Levant. For example, the letter “ق” (qāf) is pronounced differently in North African dialects compared to Middle Eastern ones. PDF resources often highlight these variations, providing comparative charts and regional pronunciations. Such materials help learners appreciate the richness of Arabic script and its adaptability across cultures. Understanding these differences is crucial for effective communication and cultural sensitivity in diverse Arab-speaking communities.
Mastery of Arabic letters, supported by PDF resources, fosters effective communication and cultural connection. Continuous practice and dedication are key to fluency and appreciation of the language.
11.1. Summary of Key Points
The Arabic alphabet, comprising 28 letters, is a foundational element of the Arabic language, with unique script and pronunciation. PDF resources provide structured learning tools, including practice sheets, charts, and workbooks, aiding in mastering letterforms, sounds, and writing techniques. These materials cater to all skill levels, offering step-by-step guides and exercises for consistent practice. The cultural and linguistic significance of Arabic letters is profound, influencing literature, calligraphy, and Islamic traditions. Regular practice, combined with digital and traditional resources, ensures progress in fluency and appreciation of the language. These resources are essential for effective learning and retention of Arabic letters.
11.2. Encouragement for Further Learning
Mastery of Arabic letters unlocks a world of cultural, religious, and intellectual treasures. Embrace the journey by utilizing PDF resources, workbooks, and digital tools to enhance your learning experience. Consistent practice, even for a few minutes daily, fosters fluency and confidence. Don’t be discouraged by challenges—each letter learned brings you closer to understanding the richness of Arabic literature and communication. Engage with interactive exercises, flashcards, and apps to make learning enjoyable and effective. Remember, every effort invested in mastering Arabic letters contributes to a deeper connection with diverse cultures and communities worldwide.
11.3. Final Thoughts on the Importance of Arabic Letters
Arabic letters are not just symbols; they are gateways to a rich cultural, religious, and intellectual heritage. Mastering them opens doors to understanding the Quran, classical literature, and contemporary works. Their unique calligraphy and phonetic precision make them invaluable in global linguistics. With resources like PDF guides and practice sheets, learning is accessible and engaging. Embrace this journey to unlock the beauty of Arabic, fostering deeper connections with diverse cultures and communities. The effort invested in learning these letters is a rewarding step toward linguistic and cultural enrichment, offering lifelong benefits for personal and intellectual growth.