marantec garage opener manual

Welcome to the Marantec garage opener manual, your comprehensive guide to installing, troubleshooting, and maintaining Marantec garage door openers․ This manual ensures safe and efficient operation, detailing essential features, proper use, and maintenance tips for optimal performance․

Overview of the Marantec Brand and Its Garage Door Openers

Marantec is a renowned brand specializing in high-quality garage door openers, known for their innovative solutions and commitment to safety․ Their product range includes advanced, stylish openers designed for residential use, such as the M-Line series, featuring models like the M4500 and M4700․ These openers are equipped with digital remote controls and photo-eye safety systems, ensuring reliability and security․ Marantec’s focus on durability and user-friendly designs makes their garage door openers a popular choice for modern homes, offering seamless integration with smart home systems and energy-efficient operation․

Importance of Reading the Manual for Safe and Effective Use

Reading the Marantec garage opener manual is crucial for safe and effective use․ It provides essential safety precautions, installation guidelines, and troubleshooting tips to prevent accidents and ensure proper functionality․ The manual details emergency release mechanisms and maintenance requirements, helping users operate the opener confidently․ Adhering to the instructions ensures compliance with safety standards and prevents potential damage to the door or opener․ Regularly reviewing the manual also aids in identifying and resolving common issues, ensuring optimal performance and longevity of the garage door opener system․

Installation and Setup Guide

This section provides detailed step-by-step instructions for installing and setting up your Marantec garage door opener, ensuring a safe and proper installation process for optimal functionality․

Step-by-Step Installation Instructions for Marantec Garage Door Openers

Begin by unpacking and inventorying all components, ensuring no parts are missing․ Mount the rail system securely to the garage ceiling, following the manual’s alignment guidelines․ Attach the motor unit to the rail, then connect the chain or belt, ensuring proper tension․ Install safety sensors 6 inches above the floor on both sides of the door․ Wire the control panel and sensors, then test the opener’s operation․ Finally, program the remote controls and test all functionalities to ensure smooth performance․

Pre-Installation Requirements and Safety Precautions

Before installing your Marantec garage door opener, ensure the garage door is balanced and operates smoothly manually․ Disconnect power to the garage door to prevent accidental activation․ Gather all necessary tools and hardware, and ensure the ceiling mounting area is sturdy and clear of obstructions․ Always wear safety gloves and eyewear․ Familiarize yourself with the manual release cord and safety features to avoid accidents․ Ensure proper ventilation and follow local building codes․ If unsure, consult a professional installer to guarantee a safe and correct setup․

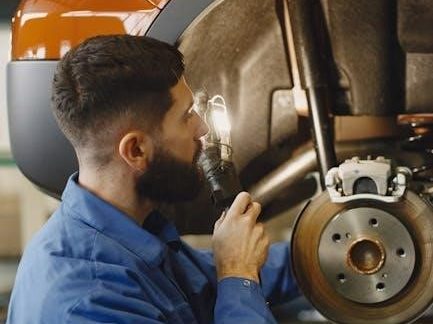
Troubleshooting Common Issues

Common issues include the door not opening, remote malfunctions, or unusual noises․ Check power supply, remote batteries, and alignment of sensors․ Lubricate moving parts if noisy․

Identifying and Resolving Common Problems with Marantec Openers

Common issues with Marantec openers include the door not opening or closing fully, strange noises, or the remote failing to respond․ Check if the manual release cord is engaged or if sensors are misaligned․ Ensure the trolley is properly connected and lubricate moving parts to reduce noise․ For remote issues, replace batteries or reset the remote․ Always refer to the manual for specific troubleshooting steps and safety guidelines to resolve problems effectively and safely․

How to Disengage the Opener for Manual Operation

To disengage the Marantec opener for manual operation, locate the manual release cord, usually attached to the trolley․ Pull the cord firmly downward or away from the door to disengage the trolley from the motor․ This allows the garage door to open or close manually․ Ensure the door is secure and balanced before disengaging․ After manual operation, reconnect the trolley by pulling the cord toward the motor until it clicks․ Always ensure the door is closed and test the opener before restarting automatic operation․

Maintenance and Care Tips

Regularly lubricate moving parts, check door balance, and inspect the chain or belt for wear․ Clean photo-eye sensors to ensure smooth operation and safety․

Regular Maintenance Tasks to Ensure Optimal Performance

Regular maintenance is essential for smooth operation․ Lubricate moving parts, check door balance, and inspect chains or belts for wear․ Clean photo-eye sensors to ensure safety․ Replace worn parts promptly and tighten loose bolts․ Check spring tension and adjust if necessary․ Regularly test door alignment and force settings․ Refer to the manual for specific intervals and procedures tailored to your model․ Proper upkeep extends lifespan and ensures reliable performance․

Replacement Parts and Accessories for Marantec Openers

For Marantec garage door openers, genuine replacement parts are available, including remote controls, chains, belts, and springs․ Accessories like additional remotes, keypads, and sensors can enhance functionality․ Always use Marantec-approved parts to ensure compatibility and safety․ Visit official distributors or online platforms for authentic components․ Regularly replacing worn parts prevents system failure and maintains performance․ Refer to the manual for specific part numbers and compatibility with your model․ Properly installed accessories and parts guarantee reliable operation and extend the lifespan of your garage door opener․

Safety Features and Guidelines

Marantec garage openers feature advanced safety mechanisms, including photo eyes and emergency release systems, ensuring secure operation․ Always follow guidelines for safe use and emergency preparedness․

Built-In Safety Features of Marantec Garage Door Openers

Marantec garage door openers are equipped with cutting-edge safety features, including photo-eye sensors that detect obstacles and automatically reverse the door․ These sensors ensure the door stops or reverses if something is in its path, preventing accidents․ Additionally, emergency release mechanisms allow manual operation during power outages, enhancing safety and convenience․ These features are designed to protect users and their property, making Marantec openers a reliable choice for home security and efficiency․

Emergency Release Mechanisms and Their Proper Use

Marantec garage door openers include an emergency release mechanism to enable manual operation during power outages or system malfunctions․ To activate, pull the release cord downward, disengaging the trolley from the motor․ This allows the door to be opened or closed manually․ Ensure the cord is easily accessible and not obstructed․ Regularly test the release mechanism to confirm proper function․ Always operate with caution, ensuring the door is secure and balanced before manual use to avoid injury or damage․ Proper use ensures safety and convenience in emergencies․

Model-Specific Information

Marantec offers various models like the M4500 and M4700, each with unique features tailored to specific needs, ensuring compatibility and performance for different garage door setups and preferences․

Marantec M4500 and M4700 Model Differences and Features

The Marantec M4500 and M4700 are high-performance garage door openers designed for reliability and durability․ The M4500 offers 1/2 HP power, ideal for standard garage doors, while the M4700 provides 3/4 HP for heavier or insulated doors․ Both models feature DC motors for quiet operation and include advanced safety features like photo-eye sensors․ The M4700 additionally supports smart home integration, allowing remote monitoring and control via compatible systems․ These models cater to different user needs, ensuring efficient and secure garage door operation with minimal noise and maximum convenience․

Other Popular Models and Their Unique Characteristics

Beyond the M4500 and M4700, Marantec offers other notable models like the Synergy Series, known for its sleek design and advanced smart home integration․ The M-Line series provides robust performance with essential features for everyday use․ Additionally, the M3-2314 remote offers reliable control and compatibility with various Marantec openers․ These models cater to diverse needs, from basic functionality to cutting-edge technology, ensuring users can choose the perfect fit for their garage door requirements․ Each model is built with Marantec’s commitment to durability and innovation․

Downloading and Accessing the Manual

Access the Marantec garage opener manual online through official links, providing detailed guides for models like M4500 and M4700․ Visit NorthShore for comprehensive support and downloads․

Where to Find Official Marantec Garage Opener Manuals Online

Official Marantec garage opener manuals are available on the manufacturer’s website and trusted platforms like NorthShore․ Visit these sites to download PDF manuals for models such as the M4500 and M4700, ensuring you have accurate installation, troubleshooting, and maintenance instructions․ These resources are free and easily accessible, providing comprehensive support for your garage door opener needs․ Always verify the source to ensure authenticity and safety․

Steps to Download and Navigate the PDF Manual

To download the Marantec garage opener manual, visit the official Marantec website or trusted platforms like NorthShore․ Locate your specific model, such as the M4500 or M4700, and click the download link to access the PDF; Once downloaded, open the file using a PDF reader․ Use bookmarks or the table of contents to navigate sections easily․ The search function can help find specific topics quickly․ Ensure your reader supports interactive features for the best experience․ Always verify the manual’s authenticity to guarantee accurate information․

raypak pool heater troubleshooting manual

Welcome to the Raypak Pool Heater Troubleshooting Manual, your comprehensive guide to diagnosing and resolving common issues with your pool heating system․ This manual is designed to help you identify and fix problems efficiently, ensuring your pool remains warm and comfortable․ Whether you’re dealing with ignition failures, low gas pressure, or error codes, this guide provides step-by-step solutions to get your heater running smoothly․ Regular maintenance and troubleshooting are key to extending the lifespan of your Raypak pool heater and maintaining optimal performance․ Let’s dive into the details and keep your pool heating system in top shape year-round․

Overview of the Raypak Pool Heater System

The Raypak pool heater system is a gas-fired, high-efficiency heating solution designed for residential and commercial pools․ It features a durable bronze or polymer heat exchanger, ensuring long-lasting performance and corrosion resistance․ The system includes a burner assembly, control panel, and safety switches to regulate and monitor operation․ Raypak heaters are known for their reliability, low NOx emissions, and user-friendly controls․ Proper installation and regular maintenance are essential to optimize efficiency and extend the heater’s lifespan․ Understanding the system’s components and operation is key to effective troubleshooting and ensuring consistent pool heating performance․

Importance of Regular Maintenance and Troubleshooting

Regular maintenance and timely troubleshooting are crucial for ensuring the optimal performance and longevity of your Raypak pool heater․ Neglecting routine checks can lead to reduced efficiency, higher energy costs, and premature wear of components․ By addressing issues like clogged filters, faulty sensors, or gas valve malfunctions promptly, you can prevent minor problems from escalating into costly repairs․ A well-maintained heater not only extends its lifespan but also enhances safety, ensuring reliable and consistent pool heating throughout the year․ Stay proactive to keep your system running smoothly and efficiently․

Common Issues with Raypak Pool Heaters

Raypak pool heaters often face issues like ignition failure, low gas pressure, insufficient airflow, or faulty venting․ These problems can significantly hinder performance and require timely attention;

  • Pilot Light or Ignition Failure
  • Low Gas Pressure or Insufficient Air Supply
  • Faulty Venting or Blocked Burner Orifice

Pilot Light or Ignition Failure

Ignition failure in Raypak pool heaters is often linked to a clogged pilot orifice or a damaged pilot assembly․ The pilot light is essential for igniting the burners, and if it fails, the heater won’t start․ A clogged pilot orifice can be caused by dirt or debris, while a faulty pilot assembly may require replacement․ Additionally, a defective flame sensor can prevent the gas valve from opening, halting the ignition process․ Regular cleaning of the pilot orifice and inspecting the flame sensor can help resolve these issues․ Always refer to the manual for detailed troubleshooting steps․

Low Gas Pressure or Insufficient Air Supply

Low gas pressure or insufficient airflow can prevent your Raypak pool heater from functioning properly․ Check the gas supply line for leaks or obstructions and ensure the regulator is set correctly․ Blocked venting or restricted airflow around the unit can also cause issues․ Verify that the surrounding area is clear and that the blower is operating correctly to provide adequate airflow․ If the problem persists, consult a professional to adjust the gas pressure or inspect the system for hidden blockages․ Proper airflow is crucial for efficient and safe heater operation․

Faulty Venting or Blocked Burner Orifice

Faulty venting or a blocked burner orifice can disrupt your Raypak pool heater’s operation․ Over time, dirt, debris, or calcium deposits may accumulate in the burner orifice, restricting gas flow; Similarly, improper venting or blockages in the venting system can prevent proper airflow, leading to ignition issues or poor combustion․ To resolve this, clean the burner orifice with a soft brush and ensure the venting system is clear․ If the problem persists, consider replacing the burner orifice or consulting a professional to inspect the venting setup for optimal performance and safety․

Troubleshooting Steps for Ignition Failure

Identify and address ignition failure by checking the pilot orifice, flame sensor, and gas valve․ Ensure the blower operates correctly and airflow is unobstructed for proper combustion and ignition․

Checking the Pilot Orifice and Assembly

Begin by inspecting the pilot orifice for blockages caused by dirt or debris․ Clean the orifice with a small brush or compressed air to ensure proper gas flow․ If the pilot light still doesn’t ignite, check the pilot assembly for damage or wear․ Remove and clean the assembly thoroughly, ensuring all components are free from obstructions․ If issues persist, consider replacing the pilot orifice or assembly to restore proper ignition․ Regular maintenance of these components is essential for reliable heater operation and safety․

Inspecting the Flame Sensor and Gas Valve

Examine the flame sensor for dirt or corrosion, as a faulty sensor can prevent the gas valve from opening․ Use a multimeter to test the sensor’s voltage output; a reading outside the 145-195 mV range indicates a defect․ Inspect the gas valve’s wiring connections and solenoid operation․ If the valve fails to open, replace it․ Ensure the flame sensor is clean and properly positioned to detect the pilot flame accurately․ A malfunctioning flame sensor or gas valve can disrupt ignition, so prompt inspection and maintenance are crucial for reliable operation․

Verifying Blower Operation and Airflow

Ensure the blower is functioning correctly to provide adequate airflow, essential for proper ignition and heater operation․ Check if the blower is running and verify its wiring connections․ Use a multimeter to test voltage supply to the blower motor․ If the blower is not operating, inspect for blockages or damage․ Clean or replace the blower as needed to restore airflow․ Proper blower function prevents overheating and ensures reliable ignition, making it a critical step in troubleshooting your Raypak pool heater․

Understanding Error Codes and Safety Switches

This section explains how to interpret error codes and identify tripped safety switches, such as the high limit, water pressure, or rollout switch, to diagnose issues accurately․

High Limit Switch, Water Pressure Switch, and Rollout Switch

The high limit switch, water pressure switch, and rollout switch are essential safety features in your Raypak pool heater․ The high limit switch trips if the temperature exceeds safe levels, while the water pressure switch ensures proper water flow․ The rollout switch activates if there’s a combustion issue․ If any of these switches trip, the heater shuts down to prevent damage․ Always identify and address the root cause before resetting the switches․ Refer to your manual for specific error codes and reset procedures to safely restore operation․

Resetting the Heater After a Safety Switch Trip

Resetting your Raypak pool heater after a safety switch trip is a straightforward process․ First, ensure the heater is turned off and allow it to cool for 20-30 minutes․ Identify and address the underlying cause, such as excessive temperature or low water pressure, before proceeding․ Once resolved, locate the reset button on the high limit switch or rollout switch and press it firmly․ Turn the heater back on and monitor its operation․ If the issue persists, consult your manual or contact a professional for further assistance․ Always prioritize safety when handling electrical or gas components․

Maintenance and Repair Tips

Regular maintenance is crucial for optimal performance․ Clean the pool filter, inspect damaged components, and ensure proper airflow․ Address issues promptly to prevent major repairs and extend lifespan․

Cleaning the Pool Filter and Pump

Cleaning the pool filter and pump is essential for maintaining your Raypak pool heater’s efficiency․ A clogged filter restricts water flow, which can lead to ignition failures and reduced performance․ Regularly backwash the filter and clean the skimmer basket to ensure optimal flow․ Inspect the pump impeller for debris and damage, and repair or replace it as needed․ Proper maintenance prevents blockages and ensures your heater operates smoothly, avoiding common issues like low pressure or insufficient airflow․ Schedule filter cleaning every 2-3 months for peak performance․

Inspecting and Replacing Damaged Components

Inspecting and replacing damaged components is crucial for maintaining your Raypak pool heater․ Regularly check the pilot orifice, flame sensor, and gas valve for wear or blockages․ If the pilot orifice is clogged, clean it gently with a small brush or replace it if damaged․ Inspect the flame sensor for corrosion and ensure it detects the pilot flame accurately․ Damaged or faulty components like the gas valve or burner tubes should be replaced promptly to prevent ignition failures and ensure safe operation․ Always refer to the Raypak manual for specific replacement guidelines․

Advanced Troubleshooting Techniques

Advanced troubleshooting involves using specialized tools like multimeters and endoscopes to diagnose complex issues․ Measure voltage at gas valves and inspect internal components for blockages or damage․ This approach helps pinpoint hidden problems quickly and effectively, ensuring your Raypak pool heater operates smoothly․

Using a Multimeter for Gas Valve Testing

To test the gas valve using a multimeter, set the device to measure millivolts (mV)․ Connect the multimeter probes to the solenoid terminals on the gas valve․ A normal reading should be between 145-195 mV․ If the reading falls outside this range, the gas valve is faulty and needs replacement․ This method helps identify issues with the valve’s electrical operation, ensuring accurate diagnosis and repair․ Always refer to the Raypak troubleshooting manual for specific instructions and safety precautions during testing․

Checking for Blockages in Burner Tubes

Blockages in burner tubes can prevent proper ignition and reduce heater efficiency․ To check for blockages, turn off the heater and allow it to cool․ Remove the burner tubes and inspect for debris, dirt, or calcium buildup․ Clean the tubes with a soft brush or replace them if damaged․ Ensure all connections are secure and free from obstructions․ Refer to the Raypak troubleshooting manual for detailed steps and safety precautions․ Regular cleaning helps maintain optimal performance and prevents ignition issues․ Always follow manufacturer guidelines for maintenance and repair․

Regular maintenance and prompt troubleshooting are essential for optimal Raypak pool heater performance․ By following this manual, you can prevent future issues and ensure efficient operation․ Proper care extends lifespan and reliability, keeping your pool comfortable year-round․ Always refer to the manual for precise guidance and safety measures․

Preventative Measures to Avoid Future Issues

Regular maintenance is crucial to prevent Raypak pool heater issues․ Schedule annual servicing by an authorized technician to ensure optimal performance․ Clean the pool filter every 2-3 months and check for blockages in burner tubes․ Properly winterize the heater to avoid damage from freezing temperatures․ Maintain correct water chemistry levels and ensure sufficient airflow around the unit․ Keep the area around the heater clear of debris and inspect electrical connections regularly․ By following these steps, you can extend the lifespan of your heater and avoid unexpected breakdowns․

singer tradition 2277 manual

Product Overview

The Singer Tradition 2277 is a versatile‚ user-friendly mechanical sewing machine with 23 built-in stitches‚ one-step buttonholes‚ and adjustable stitch settings‚ ideal for both beginners and experienced sewers.

The Singer Tradition 2277 is a mechanical sewing machine designed for household use‚ offering a perfect blend of simplicity and functionality. It features 23 built-in stitches‚ a one-step buttonhole function‚ and adjustable stitch width and length for versatility. With a maximum speed of 750 stitches per minute and a drop feed function‚ it supports free-motion sewing. This machine is ideal for both beginners and experienced sewers‚ providing a reliable and user-friendly experience for various sewing projects.

1.2 Key Features and Specifications

The Singer Tradition 2277 features 23 built-in stitches‚ including basic‚ decorative‚ and stretch stitches‚ and a one-step buttonhole function. It operates at a maximum speed of 750 stitches per minute and includes a drop feed function for free-motion sewing. The machine has a durable metal frame‚ ensuring stability‚ and comes with accessories like needles‚ bobbins‚ a seam ripper‚ and a dust cover. A detailed user manual is also provided for easy operation.

Key Features and Specifications

The Singer Tradition 2277 offers 23 built-in stitches‚ one-step buttonholes‚ and adjustable stitch width/length. It features a maximum speed of 750 stitches per minute and a metal frame.

2.1 Built-in Stitches and Stitch Applications

The Singer Tradition 2277 features 23 built-in stitches‚ including basic‚ decorative‚ and stretch stitches‚ with 97 stitch applications for versatility. It offers adjustable stitch width and a one-step buttonhole function‚ making it ideal for various fabric types and sewing projects. The machine’s stitch customization options allow users to tailor their work‚ ensuring precision and creativity in every seam.

2.2 Maximum Speed and Drop Feed Function

The Singer Tradition 2277 operates at a maximum speed of 750 stitches per minute‚ offering efficient sewing for various projects. It features a drop feed function‚ enabling free-motion sewing for tasks like quilting or embroidery. To activate‚ users can lower the feed dogs using the included darning plate‚ providing flexibility and control for creative stitching and intricate designs.

2.3 Included Accessories

The Singer Tradition 2277 comes with a variety of accessories to enhance your sewing experience. These include multiple needles‚ bobbins‚ a seam ripper‚ and a dust cover for machine protection. Additionally‚ it provides three presser feet: All-Purpose‚ Buttonhole‚ and Button Sewing‚ catering to different sewing tasks. The machine also includes a user manual for easy setup and operation guidance.

Threading and Basic Setup

Threading the Singer Tradition 2277 involves following the arrows on the machine. Set the top tension knob to 4 for balanced stitching. The free arm allows easy access for small projects.

3.1 Step-by-Step Threading Guide

To thread the Singer Tradition 2277‚ start by ensuring the machine is turned off and unplugged. Place the thread on the spool pin and gently pull it through the machine’s tension guide. Follow the arrows on the machine to guide the thread through the take-up lever and into the stitch selector. Set the top tension knob to 4 for balanced stitching. Wind the thread around the bobbin a few times‚ trim the excess‚ and insert it into the bobbin case. Pull the thread to set the bobbin tension‚ then bring the end of the thread up through the throat plate near the needle. Pull both the top and bobbin threads to secure them and test the machine on scrap fabric to ensure even stitches. If issues arise‚ rethread or adjust tension as needed.

3.2 Setting Up the Machine for First Use

To set up the Singer Tradition 2277 for first use‚ begin by unpacking and inspecting the machine and included accessories. Place the machine on a sturdy‚ flat surface and ensure the power cord is securely plugged into a nearby outlet. Wind the bobbin by guiding the thread through the bobbin winder and inserting it into the bobbin case. Pull the thread gently to set the bobbin tension. Thread the machine by following the arrows on the housing‚ ensuring the thread passes through the tension discs and take-up lever. Finally‚ test the machine on scrap fabric to ensure proper stitch formation and adjust settings as needed.

Maintenance and Troubleshooting

Regular cleaning and oiling of the Singer Tradition 2277 ensure smooth operation. Check for dust buildup and lint in the bobbin area and feed dogs. Addressing tension issues promptly prevents thread breakage‚ while proper needle alignment avoids fabric damage. Troubleshooting common issues like jammed bobbins or misaligned stitches can be resolved with adjustments outlined in the manual.

4.1 Routine Maintenance Tips

Regular maintenance ensures optimal performance of the Singer Tradition 2277. Clean the machine thoroughly‚ removing dust and lint from the bobbin area and feed dogs. Lubricate moving parts periodically to prevent friction. Check and replace needles regularly to avoid breakage. Always use the correct needle type for your fabric to prevent damage. Refer to the manual for specific guidelines on oiling and adjusting tension for smooth operation. Proper care extends the machine’s lifespan.

4.2 Common Issues and Solutions

Common issues with the Singer Tradition 2277 include needle breakage‚ thread jams‚ and uneven stitches. Needle breakage often results from using the wrong needle type or improper fabric guidance. Thread jams can be resolved by re-threading the machine and ensuring the bobbin is correctly inserted. For uneven stitches‚ adjust the tension settings or clean the machine. Regular maintenance and proper threading can prevent many of these issues. Always consult the manual for troubleshooting guidance.

Accessories and Presser Feet

The Singer Tradition 2277 includes essential accessories like needles‚ bobbins‚ and a seam ripper. It comes with three presser feet for various sewing tasks. The free arm allows easy sewing of small projects‚ enhancing versatility and convenience for users.

5.1 Overview of Included Presser Feet

The Singer Tradition 2277 comes with three essential presser feet: All-Purpose‚ Buttonhole‚ and Zipper. The All-Purpose foot is ideal for straight stitching and general sewing. The Buttonhole foot simplifies creating custom buttonholes‚ while the Zipper foot is designed for sewing zippers and heavy fabrics. These feet cater to various sewing needs‚ enhancing versatility and ease of use for both beginners and experienced sewers. The machine also includes a free arm for sewing small or cylindrical projects.

5.2 Using the Free Arm for Small Projects

The Singer Tradition 2277 includes a detachable free arm‚ perfect for sewing small or cylindrical projects like sleeves‚ collars‚ and children’s clothing. The free arm provides better visibility and control when working on intricate or hard-to-reach areas. It allows for smoother fabric manipulation‚ making it easier to handle curved seams or delicate materials. This feature is particularly useful for detailed sewing tasks.

User Manual Highlights

6.1 Navigating the Manual

The Singer Tradition 2277 manual is comprehensive‚ covering setup‚ maintenance‚ and troubleshooting. It includes visual guides for threading and step-by-step instructions for using built-in stitches and accessories. Organized into clear sections‚ the manual makes it easy to find information on specific features like buttonhole creation and drop feed operation. Written in user-friendly language‚ it ensures both beginners and experienced users can navigate the machine’s capabilities effortlessly.

6.2 Important Safety Precautions

The manual emphasizes key safety measures to ensure safe operation. Always unplug the machine when not in use or during maintenance. Avoid loose clothing or jewelry that could get caught. Keep children away while sewing. Use the correct needle type for your fabric to prevent breakage. Insert needles properly and follow guidelines for thread tension and fabric handling to avoid accidents.

Stitch Guide

The Singer Tradition 2277 offers 23 built-in stitches‚ including basic‚ decorative‚ and stretch options‚ with 97 stitch applications. Adjust stitch width and length for customization.

7.1 Types of Stitches Available

The Singer Tradition 2277 features 23 built-in stitches‚ including essential straight stitches‚ decorative patterns‚ and stretch stitches for various fabrics. It also offers 97 stitch applications‚ allowing for customization of projects. The machine includes a one-step buttonhole function‚ making it easy to create professional-looking buttonholes. Stitches can be adjusted in width and length to suit different fabrics and sewing needs‚ providing versatility for both basic and creative sewing tasks.

7.2 Adjusting Stitch Width and Length

The Singer Tradition 2277 allows easy adjustment of stitch width and length using convenient dials. Stitch width can be set between 0-5mm‚ and stitch length ranges from 0-4mm‚ enabling precise control for various fabrics and sewing techniques. This feature ensures stitches can be customized to achieve the desired effect‚ whether for delicate fabrics or heavy-duty projects‚ enhancing flexibility and creativity in sewing tasks.

Fabric Compatibility

The Singer Tradition 2277 works with various fabrics‚ including cotton‚ polyester‚ and blends. Optimize results by selecting the right needle size for fabric thickness and type.

8.1 Choosing the Right Needle for Fabric Type

Selecting the appropriate needle for your fabric type is crucial for optimal sewing performance. Use a universal needle for general sewing‚ sharp needles for woven fabrics‚ and ballpoint needles for stretch or knit fabrics. Heavy-duty needles are ideal for thick materials like denim. Always refer to the needle package for specific fabric recommendations to ensure compatibility and prevent breakage. Proper needle selection enhances stitch quality and extends needle life.

8.2 Managing Fabric Thickness and Guidance

For managing fabric thickness‚ use the appropriate presser foot and adjust the stitch length and width. Thicker fabrics may require a heavier needle and slower sewing speed. Use a walking foot or Teflon foot for smooth guidance on heavy or slippery fabrics; Always guide the fabric steadily to maintain consistent stitch quality and prevent bunching or dragging‚ ensuring professional-looking results for all projects.

Advanced Techniques

The Singer Tradition 2277 offers advanced techniques like free-motion sewing with the drop feed and one-step buttonhole creation‚ enabling intricate stitching and precise results for complex projects.

9.1 Free-Motion Sewing with the Drop Feed

The Singer Tradition 2277’s drop feed function enables free-motion sewing‚ allowing for precise control over stitching. To use this feature‚ lower the feed dogs using the machine’s mechanism or attach the included darning plate. This setup is ideal for quilting‚ embroidery‚ or repairing delicate fabrics. With the feed dogs disengaged‚ the fabric moves freely under the needle‚ giving you creative flexibility for intricate designs and custom stitching patterns.

9.2 Sewing Buttonholes in One Step

The Singer Tradition 2277 simplifies buttonhole sewing with its one-step automatic feature. Place your fabric under the buttonhole foot‚ aligning the marks. Select the buttonhole stitch and let the machine create perfectly sized buttonholes in one continuous motion. This feature ensures consistent results‚ saving time and effort for projects like dresses‚ shirts‚ or crafts. The machine’s automation makes it easy to achieve professional-looking buttonholes with minimal effort.

User Reviews and Feedback

Users praise the Singer Tradition 2277 for its ease of use‚ versatility‚ and value for money. Many appreciate the one-step buttonhole feature and sturdy metal frame. However‚ some note occasional needle alignment issues. Overall‚ it’s a well-regarded choice for both beginners and experienced sewers.

10.1 Common Praise and Criticisms

The Singer Tradition 2277 is often praised for its user-friendly design‚ variety of built-in stitches‚ and one-step buttonhole feature. Many users appreciate its durability and value for money. However‚ some critics mention occasional issues with needle alignment and thread jams. A few users also find the manual insufficient for troubleshooting. Despite these flaws‚ it remains a popular choice for sewers of all skill levels.

10.2 Real-World Usage Experiences

Users have shared positive experiences with the Singer Tradition 2277‚ praising its ease of use for everyday sewing tasks. Many highlight its versatility in handling various fabrics and its reliability for both small and large projects. Some note occasional thread jams and the need for careful threading. Overall‚ it is well-regarded for its durability and value‚ making it a practical choice for sewers of all skill levels.

Downloading the Manual

The Singer Tradition 2277 manual is available in English and can be downloaded for free from manual.nz‚ offering detailed instructions‚ maintenance tips‚ and troubleshooting advice.

11.1 Availability in English

The Singer Tradition 2277 manual is available in English‚ ensuring easy access for users worldwide. It can be downloaded for free from trusted sources like manual;nz‚ which offers a comprehensive guide to operating‚ maintaining‚ and troubleshooting the machine; The manual has been rated highly by users and includes detailed instructions to help both beginners and experienced sewers maximize their sewing experience.

11.2 Finding and Accessing the PDF

To find and access the Singer Tradition 2277 manual‚ visit trusted websites like manual.nz. Use the search bar to enter “Singer Tradition 2277” and select the correct model. Click on the provided link to view the PDF online or download it for free. Ensure the manual is in English for clarity. This straightforward process allows users to easily access detailed instructions for their sewing machine.

The Singer Tradition 2277 is a reliable and versatile sewing machine‚ perfect for everyday sewing projects. It is ideal for both beginners and experienced sewers‚ offering essential features that make it a great addition to any sewing kit.

12.1 Final Thoughts on the Singer Tradition 2277

The Singer Tradition 2277 is a reliable and versatile sewing machine‚ ideal for both beginners and experienced sewers. With 23 built-in stitches‚ adjustable settings‚ and a sturdy metal frame‚ it offers excellent value for everyday sewing projects. Its user-friendly design and compact size make it a practical choice for various tasks‚ ensuring durability and consistent performance. A great option for those seeking a simple yet efficient sewing experience.